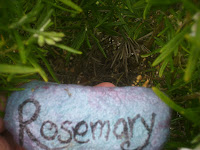
 A few weeks ago another Master Gardener suggested I put some larger markers in the herb beds in our local teaching garden. Well, the markers she had in mind look good in her formal rose bed, but are a little too formal for the beds where I work. Boring. To me, anyway. So I went online and searched out some free-ish, more interesting (to me) options, preferably that could be made at home.

 My daughter Cecilie and I made these.(All the super-cute ones Cec made. Mine are pretty basic.)
What do you think? We are having a great time making them and sharing with the community garden and decorating our own yard, too.

Here are the steps to making Plant Markers.

Materials: Rocks, acrylic paint/craft paint in a variety of colors, paint pen (opt), paint brushes, spray urethane (clear spray paint).
1. Collect rocks. Our rule has been: If someone paid for the rocks for drainage or landscaping, we may not use them (no matter how awesome they would be). We find ours at the beach, in ditches, along the side of the road, wherever.
2. Make sure the rocks are reasonably clean. I soak them briefly in a bucket, then rinse and air dry. Sometimes they have needed a bit of scrubbing.
3. On a table covered with newspaper, paint background color, if desired. (Some rocks are beautiful as background.) Let dry.
4. Using paint pen or brush with acrylic paint, paint the name of your plant. Let dry.
5. Spray with clear spray coating; let dry. Place near chosen plant!!


